Sunday, December 30, 2012

How to Find Locally Grown Organic Foods


http://www.westonaprice.org/local-chapters/find-local-chapter

Local chapters help you find locally-grown organic and biodynamic vegetables, fruits and grains; milk products, butter, eggs, chicken and meat from pasture-fed animals.  They also represent the Weston A Price Foundation at local fairs and conference and may host cooking classes, potluck dinners and other activities to help you learn to integrate properly prepared whole foods into your lifestyle.  Local chapters may be able to put you in touch with health practitioners who share the same philosophy and goals.


Sugar Free Oat Drops

http://blueberrygirlinoz.blogspot.com/2010/05/no-sugar-oat-drops.html

These are actually drop cookies, but as explained at the end, they can also be made using cookie cutters!

When I first saw this recipe I was intrigued by the fact that these have NO sugar, butter, eggs or anything that can be considered unhealthy. Always on the hunt for things to throw at me kids at feeding time, I gave them a whirl. They are amazing, surprisingly light, incredibly filling and tasty. You can freeze them individually and you have a easy breakfast on the go, that contains your protein and carbs to set you up for the day.

1 1/2 cups regular rolled oats (Use gluten free oats if on a gluten free diet)
1 cup coconut flakes (Unsweetened)
1/2 teaspoon salt
1 teaspoon cinnamon
1/2 teaspoon allspice
1/4 cup of almond meal
1/2 cup mixed nuts, finely chopped
1 cup dried fruit (I used 1/2 chopped dried dates, and 1/2 raisins)

3 ripe bananas, mashed
1/4 cup canola oil
1 teaspoon vanilla extract

Preheat oven to 350 degrees. Line baking sheet with parchment paper.

In a large bowl, combine rolled oats, almond meal, mixed nuts and coconut flakes. Stir in allspice and cinnamon. Add dried fruit and stir until well and evenly mixed. Make sure the dried fruit do not stick together in big batches.

In another bowl, combine canola oil, mashed banana and vanilla extract. Pour wet ingredients over dry ingredients and stir until well combined.

Take a large cookie cutter and press spoonfuls of the batter into it. Remove cookie cutter. Bake for about 20 minutes or until edges are golden brown.

Peeling Potatoes the Easy Way

This is especially a time and energy saver when making a large amount of mashed potatoes or potato salad!  It really works! http://lajollamom.com/2010/10/food-on-fridays-peeling-potatoes-without-a-peeler/
Boil a large pot of water.
Score Idaho potatoes around the "waist" with a sharp knife.
Put scored potatoes into boiling water and cook until tender.
Plunge hot potato into ice water.
Hold potato with a hand on each end, and pull off the skin.
It's like magic!


Wednesday, December 12, 2012

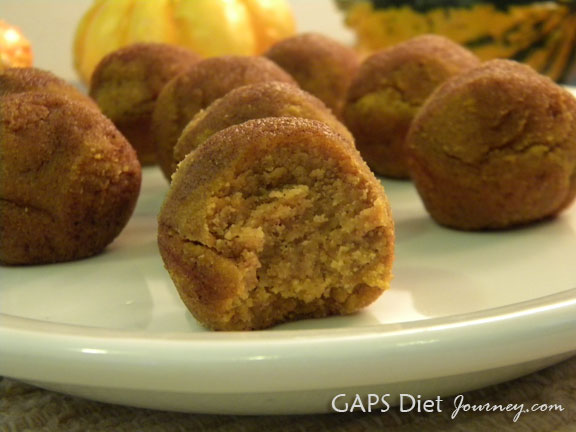
Pumpkin Poppers Gluten Free Grain Free


Pumpkin Poppers with Cinnamon Topping
Something about the weather cooling down brings out the pumpkin lover in me.  In my twenties when my children were very little, we always roasted a big Jack-o-Lantern pumpkin, usually after we’d carved it earlier in the day. However, when I started gardening seriously in my 30s I learned that the big pumpkins are apparently not actually meant for human consumption, and to make the best pumpkin pie you should use the special (expensive) little pie pumpkins.  Purportedly the big pumpkins are less sweet and can have a grainy texture, and are mostly fed to livestock.
I was shopping at one of the local discount food stores and they had a large supply of Jack-o-Lantern pumpkins for $1.99, and they were all larger than a basketball.  We had been invited to a potluck and I called to ask the hostess if she would like me to buy a couple for her to use as decorations.  And then I bought two for myself.
We never did carve the pumpkins, and I got to thinking that less sweetness is probably a good thing for those of us on GAPS.  And winter squash has been so expensive so far this year.  I decided that I was going to try roasting one of the big pumpkins and I was happy with the result.  I did find that the pumpkin texture had a slight bit of crunch, but that was not enough of a deterrent to finding ways to use them.
I was browsing around the Internet and I found these cute little pumpkin bites* which were of course made with regular white flour, sugar and other non-GAPS allowed ingredients, so I decided to test my conversion skills.
I brought these to work with me on Halloween to share with my coworkers and my boss liked them so much that she requested that I bring them to our Christmas potluck.
These remind me of cake doughnut holes… they are moist and delicious with a hot cup of tea or GAPS Friendly Hot Chocolate.  They also freeze perfectly well so you can make ahead of time – just remember to thaw to room temperature which will take about two hours.  You will find a printable version of this recipe at the bottom of the post.
Oh, and one more thing: These are dairy-free, but of course butter is legal on GAPS.  If you do not have to avoid butter, you may want to substitute the cinnamon topping mixture with butter instead of coconut oil.  It is quite delicious.
Yields: 18
Pumpkin Poppers

Be sure to get an exact 1/2 cup of coconut flour by using the back of a straight edged knife to level off the flour even with the top edge of the measuring cup. Measure all dry ingredients (coconut flour down to ginger) in a large mixing bowl.  If you freeze your coconut flour (like I do with mine to keep it moist and fresh), you may sift after measuring to make sure there are no little hard clumps.
Mix together.
Pumpkin Poppers Dry Ingredients
Place 3 eggs into your Magic Bullet, blender or food processor with 1/2 cup of cooked carrots and 1/2 cup pumpkin. Feel free to use any kind of winter squash or any combination of pumpkin, winter squash or carrots.

Blend until completely smooth.
Place melted coconut oil, honey and vanilla into a small bowl. Add the winter squash and eggs mixture into the bowl and whisk.Pumpkin Poppers Wet Ingredients
Add wet ingredients to dry ingredients.  Using a hand mixer, blend for 1-2 minutes until completely mixed. As the coconut flour absorbs the liquids the mixture will go from a very runny consistency to a thicker consistency.
Pumpkin Poppers Batter
Allow the batter to sit for 5 minutes so that the coconut flour can absorb the liquids.

Preheat oven to 325°F.
Pumpkin Poppers Batter
Use coconut oil to grease a mini muffin tin.
Lightly sprinkle coconut flour into the bottom of each muffin cup.
Measure out two tablespoons of batter for each popper.  It would be awesome to have one of these: [easyazon-link asin="B000SSVRYM" locale="us"]Norpro 703 Grip-EZ 2-Tablespoon Stainless Scoop[/easyazon-link].
The batter should be of the consistency where you can pick it up in your hands and form into a little ball. If you have to use a tablespoon measurement like me, be sure that you completely meld the two parts together, otherwise when they bake you will end up with little splits and fissures where you placed them together. If by chance your batter is not thick enough, add in coconut flour by the teaspoon waiting a minute or two in between adding more. If your batter is too thick, you could try adding more pumpkin.
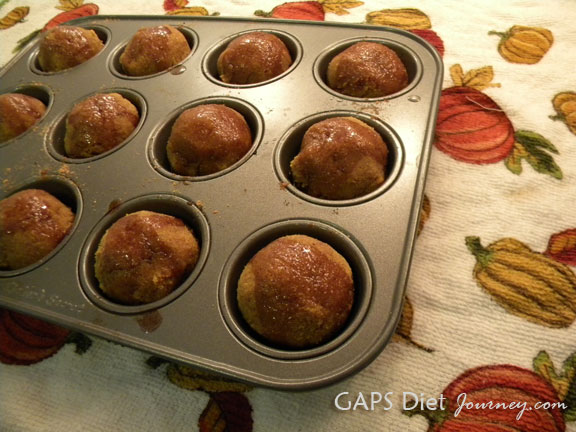
Drop into the muffin tins. I don’t advise using cupcake papers for this recipe – in the last step you will drizzle a liquid cinnamon topping which will make a sticky mess of the papers so it is best to just put them bare naked into the muffin tin.
Pumpkin Poppers in the Mini Muffin Tin
Bake for 20 minutes.

For the topping mix 1 tablespoon melted coconut oil with 1 tablespoon honey and 1/2 teaspoon ground cinnamon.
When the poppers are done, as soon as you remove them from the oven using a 1/4 teaspoon measuring spoon drizzle 1/4 teaspoon of the topping mixture on each popper.
The topping will melt into the popper and will also spill down and soak into the bottom.
Carefully remove each popper, they should not stick because of the coconut flour placed under each one but I had a couple that were still a little stubborn and didn’t want to come loose.
Pumpkin Poppers with Cinnamon Topping
Please let me know if you have any questions, comments or suggestions!
This post has been shared at Fat Tuesdays and at GAPS Friendly Fridays #18. This post was featured at Real Food Forager Sunday Snippets.

If you’re looking for more pumpkin recipes, here are some others from my blog:


Pumpkin Bread Gluten-Free, Grain-Free, Sugar-Free and Dairy-Free


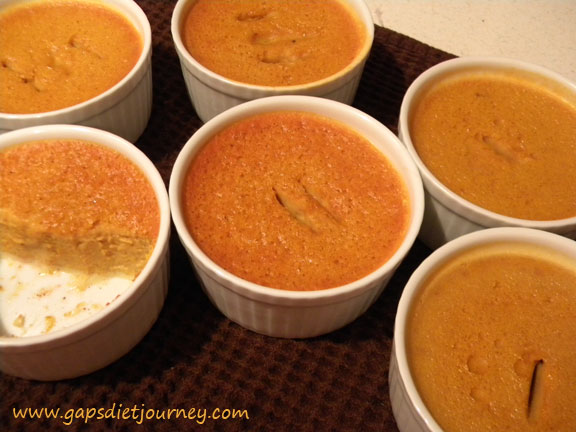
Pumpkin Coconut Milk Custard

Coconut Milk Honey Pumpkin Custard

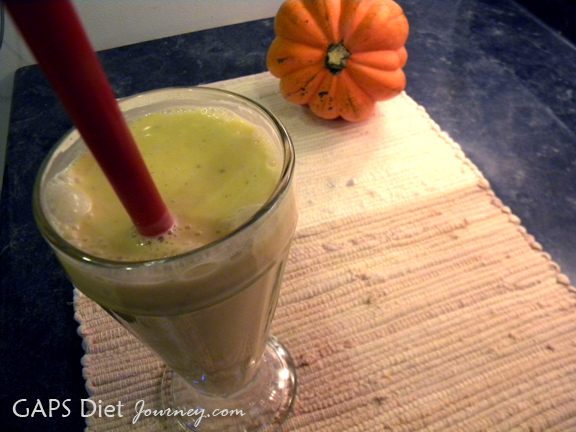
Pumpkin Coconut Smoothie

Coconut Milk Pumpkin Smoothie
Happy eating!

**If you order from Tropical Traditions by clicking on any of my Tropical Traditions links and are a brand new customer, you will receive this free book: Virgin Coconut Oil : How it Has Changed People’s Lives, and How it Can Change Yours, and I will receive a discount coupon for referring you. Thank you!

Pumpkin Poppers made with Coconut Flour
Recipe Type: Dessert
Cuisine: Gluten-free, Grain-free, Dairy-free
Author: Starlene Stewart from GAPS Diet Journey
Prep time:
Cook time:
Total time:
Serves: 18
These little pumpkin bites are moist and delicious with a hint of cinnamon.
Ingredients
  • 1/2 cup coconut flour, firmly packed (I used Tropical Traditions)
  • 1/2 teaspoon sea salt
  • 1 teaspoon ground cinnamon + 1/2 teaspoon cinnamon, divided use
  • 1/4 teaspoon nutmeg
  • 1/2 teaspoon allspice
  • 1/4 teaspoon ground cloves
  • 1/4 teaspoon ground ginger (optional)
  • 3 large eggs
  • 1/2 cup cooked pumpkin and 1/2 cup carrots
  • 1/3 cup virgin coconut oil, melted + 1 Tablespoon coconut oil, divided use
  • 1/4 cup raw honey + 1 Tablespoon honey, divided use
  • 1 teaspoon vanilla
Instructions
  1. Be sure to get an exact 1/2 cup of coconut flour by using the back of a straight edged knife to level off the flour even with the top edge of the measuring cup. Measure all dry ingredients (coconut flour down to ginger) in a large mixing bowl. If you freeze your coconut flour (like I do with mine to keep it moist and fresh), you may sift after measuring to make sure there are no little hard clumps.
  2. Mix together.
  3. Place 3 eggs into your Magic Bullet, blender or food processor with the 1 cup of winter squash.
  4. Blend until completely smooth.
  5. Place melted coconut oil, honey and vanilla into a small bowl. Add the winter squash and eggs mixture into the bowl and whisk.
  6. Add wet ingredients to dry ingredients.
  7. Using a hand mixer, blend for 1-2 minutes until completely mixed. As the coconut flour absorbs the liquids the mixture will go from a very runny consistency to a thicker consistency.
  8. Allow the batter to sit for 5 minutes so that the coconut flour can absorb the liquids.
  9. Preheat oven to 325°F.
  10. Use coconut oil to grease a mini muffin tin.
  11. Lightly sprinkle coconut flour into the bottom of each muffin cup.
  12. Measure out two tablespoons of batter for each popper.
  13. The batter should be of the consistency where you can pick it up in your hands and form into a little ball.
  14. Drop into the muffin tins. I don’t advise using cupcake papers for this recipe.
  15. Bake for 20 minutes.
  16. For the topping mix 1 tablespoon melted coconut oil with 1 tablespoon honey and 1/2 teaspoon ground cinnamon.
  17. When the poppers are done, as soon as you remove them from the oven using a 1/4 teaspoon measuring spoon drizzle 1/4 teaspoon of the topping mixture on each popper. The topping will melt into the popper and will also spill down and soak into the bottom.
Notes
You may use all pumpkin or winter squash – I used 1/2 carrots for more orange color since my pumpkin was not orange enough for my liking. These freeze well and are just as delicious once brought to room temperature (about 2 hours).

Monday, October 1, 2012

Homemade Apple Cinnamon Granola

Makes 16 small servings (1/4 cup each)
    • 1/4 cup raw honey (or 100% pure maple syrup)
    • 1/4 cup virgin coconut oil
    • 1 tsp. pure vanilla extract
    • 3 cups old-fashioned rolled oats
    • 1/2 tsp. ground cinnamon
    • 1/4 tsp. sea salt
    • 1/2 cup chopped, dried, unsweetened apples
    • 1/4 cup raisins
    • 1/4 cup coarsely chopped raw walnuts
  1. Preheat oven to 300° F.
  2. Line baking pan with parchment paper. Set aside.
  3. Heat honey and oil in small saucepan over low heat, stirring frequently, for 2 minutes or until oil has melted. Add extract; set aside.
  4. Combine oats, cinnamon, and salt in a large mixing bowl; mix well.
  5. Combine oat mixture and honey mixture, stirring until oats are evenly coated with honey.
  6. Place on prepared baking pan, spreading in a thin, even layer.
  7. Bake for 30 to 35 minutes, stirring every 10 minutes, until granola is light golden brown and crunchy.
  8. Cool granola completely (it will get crunchier as it cools).
  9. Add apples, raisins, and walnuts; mix well.

Wednesday, September 5, 2012

Beef Stir Fry


Slice or chop all of the ingredients before starting, so nothing gets overcooked while you prep other vegetables.  This way everything gets cooked as it should.   There should be a variety of textures, with some crispness remaining.

1-2 Tbsp. coconut or olive oil
1 large sweet or purple onion, thinly sliced
1 garlic, squeezed through a garlic press
carrots, sliced julianne style (as shown)
lean beef for stir fry, sliced thin
yellow squash, sliced
broccoli flowerettes, broken in small pieces
snow peas
about 1 Tbsp. ginger paste (found in produce department)

 Ginger Paste - How to Make Your Own 
salt and pepper to taste
soy sauce, if desired


Heat a couple tablespoons of olive or coconut oil in a stir fry pan or skillet.  Stir fry the onion until limp, even browned a bit, along with the garlic.  Add the carrots next, since they need more cooking time than the other vegetables.

Other vegetables that can be added to a stir fry:
Red, yellow and green peppers, fresh green beans that have been blanched, peas, water chestnuts, Chinese cabbage, zucchini, fresh spinach, butternut squash, sweet potatoes, and more.
 

Friday, August 31, 2012

Banana Oat Cookies


Rolled oats is used in place of flour for this recipe.  For those who must stick to a gluten free diet, gluten free oats would fill that need.  The raisins, banana and applesauce supply sweetness in this sugarless recipe.
 
3 mashed ripe bananas
1/3 cup applesauce
2 cups rolled oats
1/4 cup almond milk
1/2 cup raisins, optional
1 tsp. vanilla
1 tsp. cinnamon

Mix all ingredients together and place on a greased cookie sheet.  Bake at 350 degrees for 15-20 minutes.


Sunday, July 29, 2012

Ten Combinations for Frozen Fruit Popsicles

by Lois Breneman - Heart to Heart -  Copyright July, 2012

Tupperware popsicle molds

A specialty popsicle mold, but almost any kind will do!

How would you like ten combinations for nutritious and delicious fruity frozen treats (with no sugar) in the form of popsicles to make with your family for a hot summer day?

Of course, you can make these the quickest way by completely blending the fruit in a blender with juice, water, or milk, and simply pour into popsicle molds.
But instead of the above method that I've always used before, I wanted to make a summer treat that would show off the beautiful colors, shapes and designs in a fruit combination.  First I gathered together a variety of fruit, such as kiwi, oranges, cherries, grapes, strawberries, bananas, peaches, mango, blueberries, crushed or pineapple tidbits as well as apricots.  The pineapples and apricots could be fresh or canned in their own juice.

For spectacular texture, color and design, you can use a kiwi slice, a wedge of an orange slice, a jeweled strawberry slice, pineapple tidbits, halves of cherries or grapes, or small chunks of banana.  The secret is to place the fruit along the sides of a popsicle mold, so it will be visible when removed from the mold.  Kiwi and strawberry slices especially add a great look.
Why not have the children (of all ages - teens included) help assemble these individualized popsicles! You only need about two or three different fruits per popsicle, and they can all be a little different. That's the beauty of it.  Another option would be to make a different version each week.  The most difficult part of this activity will be waiting for them to freeze!

Strawberry Kiwi Pops
Put strawberries and milk (or coconut milk or yogurt) in the blender and add a little stevia for sweetener.  Place one or two kiwi slices along the edge of a popsicle mold.  Place halves of seeded cherries along the edge, and stick in a few pieces of a peach or pineapple if there is enough room.  Slowly spoon the strawberry mixture into the mold, making sure the fruit is clinging to the sides.  Slip a knife down into the mold to remove any air bubbles.

Strawberry Blueberry Pops
Place strawberry slices along the sides of a popsicle mold.  Puree blueberries with milk, coconut milk, or vanilla yogurt, and a little stevia.  Spoon the blueberry mixture into the popsicle mold, making sure the strawberry slices are clinging to the sides.  Slip a knife down into the mold to remove any air bubbles.

Cherry Yogurt Pops
Pit and halve several bing cherries and place them along the sides of a popsicle mold.  Spoon in vanilla or cherry yogurt.

Orange Pineapple Kiwi Pops
Place peeled orange slice wedges or chunks along the sides of a popsicle mold.  Slip in a kiwi slice or two for extra color and design.  Spoon in canned crushed pineapple in its own juice until the mold is filled.  Another option would be to make a puree of pineapple in its own juice to spoon into the mold.

Peachy Pineapple Pops
Place chunks of peach along the sides of a popsicle mold.  Fill up the mold with canned crushed pineapple in its own juice.  Another option would be to make a puree of pineapple in its own juice to spoon into the mold.

Kiwi Banana Apricot Pops
Place slices of kiwi and banana along the sides of a popsicle mold.  Spoon in chopped canned apricot in its own juice until filled.  Another option would be to make a puree of apricot in its own juice to spoon into the mold.

Strawberry Vanilla Pops
Place several slices of red ripe strawberries along the sides of a popsicle mold.  Spoon in vanilla yogurt around the strawberries.

Creamy Grape Pops
Cut grapes in half and place along the side of the popsicle mold.  Blend vanilla yogurt with a little grape juice, and slowly pour into the popsicle mold.

Kiwi Mango Pineapple Pops
Place several slices of kiwi along the sides of the popsicle mold.  Place chopped mango along the sides as well.  Spoon in crushed pineapples with pineapple juice.

Patriotic Pops
Place strawberry slices along the sides of the mold.  Puree blueberries with vanilla yogurt.  Spoon a little blueberry mixture into the popsicle mold.  Then spoon in some vanilla yogurt, making sure the strawberry slices are clinging to the sides.


As you can see, this is a very versatile way to make healthy and beautiful popsicles.  The possibilities are unlimited!  I'm sure your family will come up with even more winning combinations. 

Popsicle Tips:
To release the frozen goodness inside the mold, run warm water over the bottom and sides.

A coffee filter or baking liner is perfect for slipping the popsicle stick through to prevent tasty drips from settling on clothing being worn by the "licker." 

How to Remove Berry Stains:
If you do find berry stains on clothing, boil some water in your tea kettle.  Lay out the stained clothing flat in the sink.  Then holding the tea kettle about two feet above the stain, slowly pour a steam of boiling water on the stain, and watch the berry stain disappear like magic!

Carrot, Fingerling Potato and Pea Ragout

Thanks to Carol Miller in Pennsylvania for this great recipe!
 
Hearty caramelized carrots and potatoes are the base for this side dish (or main dish).  Peas, baby spinach, lemon and tarragon add a bright fresh twist.  Serve with roast chicken or seared fish.  Serves 4 to 6 - Fingerling potatoes are elongated in shape, resemble a finger, and they are almost a sweet creamy flavor.  They look nice on a platter, but other potatoes would be fine for this recipe.

1 medium lemon
1 tsp. balsamic vinegar
1 tsp. maple syrup or a little stevia
1 Tbsp. water
3 1/2 Tbsp. butter chilled
2 Tbsp. extra virgin olive oil or more if needed
1 1/2 lb. large carrots cut into 2" long 1/2"thick sticks ( I love carrots and used extra)
3/4 tsp. kosher salt
12 oz. fingerling potatoes cut in half lengthwise, if longer than 2" cut in half crosswise (used extra)
1 cup low-salt chicken broth or water
1 1/2 tsp. minced garlic
3/4 cup fresh blanched peas (or frozen, thawed)
2 oz. stemmed baby spinach leaves
2 tsp.chopped fresh tarragon (used dried parsley)
 
Finely grate lemon to yield 1 tsp. zest and juice it to yield 1 1/2 tsp. juice. In small bowl combine zest, juice, vinegar, maple syrup, and 1 Tbsp. water.
 
In a deep wide pan heat 1 Tbsp. butter and 2 Tbsp. olive oil over low heat or little higher.  Add carrots and 3/4 tsp. salt. Cover and cook, stirring once in a while gently until nicely browned and just tender (25 min. more or less).  With slotted spoon transfer to a large plate.
 
Add 1 Tbsp. butter to remaining fat in pan.  If no fat in pan, add olive oil.  When butter melts arrange potatoes cut side down in a single layer in pan. Add a little salt if needed. Cover pan partially and cook undisturbed until potatoes are deep golden brown on bottom (10 or 15 min.).  Add chicken broth or water and bring to a boil; reduce to a simmer and cover partially.  Cook until potatoes are tender and liquid has reduced to few Tbsp. (15 min or so).  Add garlic to potatoes and cook, stirring gently until fragrant (about 30 seconds).  Add reserved carrots, peas and lemon juice mixture.  Stir and cook a few minutes.  Add spinach, stirring gently until spinach is wilted.  Remove pan from heat and add remaining 1 1/2 Tbsp. butter; stir until just melted.  Stir in tarragon or parsley.  Transfer to platter and serve.
 

Monday, July 23, 2012

Safe and Natural Produce Wash

by Lois Breneman - Heart to Heart
Copyright June, 2012

My nutritionist, Stephanie Hein, gave me this recipe for safely washing produce when I asked for a better alternative.  It's very inexpensive as well, compared to the ones available in stores.  When you mix this up, be sure to use a "large" bowl, because otherwise it will fizz up and overflow.  Children would love helping you make this easy recipe, because it would be a great science experiment for them as well!

1 cup water

1 cup vinegar (I used white distilled.  By the way, there is no vinegar smell because of the baking soda.)
2 Tbsp. baking soda
2 Tbsp. lemon juice  (To save time, I added 2 extra tablespoons of vinegar rather than squeezing a lemon)

Pour into a spray bottle.  Spray produce liberally and allow to set for 5 minutes, then rinse well.  If you have a hand sprayer for rinsing, even the friction of the water helps to remove pesticides.

Sunday, July 1, 2012

Gluten Free Flour to Make Waffles, Pancakes, etc.


Gluten Free Flour
Thanks to my daughter-in-law, Rachael Breneman, for this recipe!  I've learned so much from her!
I ordered most of my flours from i-herb.com.  If you've never ordered from them, you may use my e-mail address to get a discount on your first order.)  Although I don't benefit, you will save $5.

1 cup brown rice flour
1 cup fava, garbanzo, or white bean flour
1 cup millet flour
1 1/2 cups potato starch
1 1/2 cups tapioca starch
2 cups sorghum flour
1 cup almond flour
(Store flour in refrigerator or freezer).


Gluten Free Waffles or Pancakes
1 cup gluten free flour (above)
2 tsp. baking powder
1/2 tsp. salt
1 cup liquid (I usually use less and usually use carrot juice)
*1 large egg (See egg replacement instructions below)
1 large egg yolk
1 1/2 Tbsp. oil (I usually use more for extra calories and nutrition as well as to keep from sticking.) 

*You can replace 1 whole egg with 1 Tbsp. milled flax seed and 3 Tbsp. hot water.  Allow to set for 2-10 minutes before adding to a recipe.

Spelt Tortilla Crisps

Thanks to Lorna Grooten in Virginia for sharing this recipe!
2 cups light spelt flour
1 tsp baking powder
1/2 tsp sea salt
1/4 cup light olive oil
1/2 to 3/4 cup warm water
Combine flour, baking powder, and salt.
Add the oil and mix until blended.
Work water into the dough until a sticky ball forms.
Cover the dough with plastic wrap and let rest for at least 30 minutes.
Divide the dough into 6 to 8 balls. Cover them again with plastic wrap.
Roll the balls out on lightly floured surface into tortillas measuring 6 or 7" and 1/8" thick.
Cook tortillas in a heavy cast iron skillet for 30 seconds on each side.
Cut them into wedges and bake them at 350 for 8-10 minutes.
Serve with your choice of dip.

Tasty Tidbits

Beautiful and Tasty Appetizer or Snack ~ Place three chunks (1 each of pineapple, banana and strawberry) on a toothpick. Dip one side into dark or white chocolate.  Place on wax paper and allow chocolate to harden.

Dip Strawberries in Yogurt and Freeze on wax paper.  You will get an amazing appetizer or snack!  Cut them in half while frozen for an even more beautiful presentation!

Veggie and Dip Cups ~ Using clear plastic bathroom cups or clear juice glasses, pour a few tablespoons of veggie dip into the bottom of each cup.  Add sticks of celery, carrots along with strips of red, yellow and green peppers for a colorful appetizer, salad, or snack.

Roast Green Beans with olive oil and fresh Parmesan.  Sprinkle with seasoned salt.

Roast Asparagus with grated lemon zest.  Sprinkle with seasoned salt.

Healthy Breakfast Smoothie ~ In a blender, process 2 ripe bananas, 2 cups ice, 1/3 cup yogurt, 1/2 cooked oatmeal, 1/3 cup almonds, and a little honey.

Fruit and Veggie Smoothie ~ In a blender or Vitamix, add: 2 cups filtered water, 1 Tbsp. coconut oil, 1 Tbsp. honey, 2 Tbsp. fresh lemon juice, 1 cup kale, 1 box strawberries.  Add a few blueberries to get rid of the green color, which may turn off most kids.

Wednesday, May 2, 2012

Angel Food Cake

Since I shared last month how I use my saved egg whites (because of a food sensitivity) to make angel food cakes to give away and bless others, I thought I'd better share my recipe which came from a very old (falling apart) Betty Crocker cookbook, that my mother-in-law used all her married life.  Egg whites freeze very well, by the way.

Set out an angel food cake pan but do not grease!  If you do grease the pan, the cake will flop.  Unfortunately when I taught my daughter how to make an angel food cake during her teen years, I mistakenly had her grease the pan!  Big mistake on my part!  It was a total flop!

Measure and sift together:
     1 cup sifted SwansDown or Softasilk cake flour
      3/4 cup plus 2 Tbsp. granulated sugar

Measure into large mixing bowl:
     1 1/2 cups egg whites (approximately 12)  Be sure not to get a speck of egg yolk in or it will not work.
     1 1/2 tsp. cream of tartar
     1/4 tsp. salt

Beat egg white mixture with electric mixer until foamy  Gradually add 2 Tbsp. at a time:
     3/4 cup granulated sugar

Continue beating until meringue holds stiff peaks.  Fold in:
     1 1/2 tsp. vanilla flavoring
     1/2 tsp. almond flavoring

Sift the flour/sugar mixture gradually over the meringue, folding in just until the dry mixture disappears.  Place batter into an ungreased tube pan.  I find that a two-piece cake pan works best in removing the cake from the pan.  Gently cut through the batter with a knife to remove air pockets.  Bake in a preheated 375 degree oven for 30 to 35 minutes or until a toothpick comes out clean.  Invert onto a funnel and let hang until cool.  Any small bottle with a skinny top, such as a bottle of hot sauce works well.

After the cake is completely cool, I slip a sharp knife along the sides of the pan as well as around the center hole, and along the bottom to loosen the cake.  After I lift out the center insert, I run the knife along the bottom of the pan to loosen the cake.  Invert onto a plate.  Serve with whipped cream and berries.

There are just a few critical steps to remember when making angel food cakes:
 
   Never grease the cake pan for an angel food cake!  Greasing the pan prevents rising.  The cake will definitely flop.
 
   Use a clean, dry bowl and beaters to beat the whites.  
 
Grease will prevent the whites from whipping up into soft peaks.
 
   Be sure not to get specks of egg yolk in the whites while separating the eggs.  Fat prevents whipping into peaks.
 
   After removing from the oven, hang the cake upside-down on a funnel to cool, propping the pan so it will not tip over.
 
   Slide a knife along areas where the cake touches the pan to loosen, otherwise a chunk of the cake may pull off.
 
   If you follow these steps, your cake will magically turn out great!

Baked Almond-Parmesan Crusted Chicken Breasts

An easy low fat and low carb recipe from Darlene Weber, Thailand - Used by permission

1 cup smoked almond nuts (ground in a food processor or chopper
1/2 cup ground Parmesan cheese
5-6 Chicken breasts sliced to half thickness
Salt and pepper

Mix almonds and Parmesan cheese together.  S
prinkle each side of the breast slices with salt and pepper, as well as the nut and cheese mixture.  Bake at 350º for 23-25 minutes. Do NOT overbake or the meat will be dry.

Tuesday, March 27, 2012

Lime Tahini Sauce

Thanks to Rachael Breneman in Ohio for this recipe!
This is good on many things, especially on salads or vegetables.

1/2 cup water
1/2 cup tahini (sesame seed butter)
1/4 cup lime juice
1/4 cup soy sauce 
1 tsp. minced garlic
Sweetener (agave, organic sugar or stevia) to taste

Combine all ingredients in blender until combined.  Adjust sweetener to taste.  It it thickens, thin with water.

Notes from Lois: Lemon juice can be used in place of lime juice, and almond butter could replace tahini.

If you live near a Trader Joe's store, or will be near one in your travels, keep in mind that they sell delicious almond butter in 1 pound jars for only $4.99.  It's double that price many other places, so I always stock up when I get the chance.

Crockpot Breakfast Casserole

Thanks to Linda Crosby in Virginia for this recipe!

How about a delicious breakfast all ready when you get up? 
 
Try this:
Ingredients:  (Adjust to your family size)

30 oz. package of plain frozen hash brown (shredded) potatoes
Cooked sausage, or leftover diced ham (I used turkey sausage)
1 1/2 cups shredded cheese
12 eggs
1 cup skim or fat free milk
1 tsp. kosher salt
1 tsp. black pepper
Optional:
1/2 onion, diced
1 green bell pepper, diced thin

Directions:
(I used a 6 quart Smart-Pot for this recipe.)

Spritz the inside of your crockpot with oil. Dump in the whole package of hash browns. Spread them out, and break up any clumps.

In a mixing bowl, mix the eggs with the milk, salt and pepper, cheese, diced meat, and diced vegetables. Pour everything on top of the hash browns.

Cover and cook on low for 6-8 hours, or on high for 3-4. This is done when the eggs are fully cooked and the edges start to brown a bit. If you want the cheese to brown and get a bit crispy on the sides, cook it longer.

Almond Butter Carob Crunchies

www.hacres.com - Used by permission
A recipe I definitely want to make for my grandchildren!  This would be great for our summer vacation when our family will all be together!

3/4 cup almond butter
1/2 cup carob powder
3 Medjool dates, pitted, soaked 2 hours, and drained
1/2 cup rolled oats
1 cup almonds, walnuts or pecans, chopped
1/2 cup unsweetened grated coconut

Reserve 1/4 cup coconut.  Combine remaining ingredients in a food processor, and with an S blade, mix well.  Shape mixture into bite-size balls.  Roll in reserved coconut.  Store in refrigerator in plastic container with wax paper between layers.
 
Note: Natural peanut butter and cocoa powder could be substituted for the almond butter and carob powder if you wish.

Cooking Dried Beans for Easy Digestion

Satisfying, versatile, and very inexpensive  -about $1 per pound - at a time when budgets need to be stretched to put gas in our vehicles!   I just cooked another 4 pounds today!  They freeze very well!

A few months ago I shared how to cook beans to be easily digestible.  A nutritionist told me to soak grain overnight by adding 1/4 cup apple cider vinegar for every cup of grain.  However, I adapted this recipe and found it works just as well without the beans soaking up so much vinegar.

Soak the following overnight in a large Dutch oven or cooking pot:
4 pounds of dried beans, washed thoroughly in a colander (Great Northern or pinto beans are very good)
1 gallon of distilled water
1/2 cup apple cider vinegar
Note: Do NOT add any salt at this point!  Salt will prevent the beans from getting tender.  Salt and season later.

After soaking overnight or at least 8 hours, drain and rinse the beans several times.  Cover with more pure water and bring to a boil.  A foam may cover the top after they come to a boil.  Skim off the foam with a large spoon.  I hold the lid in my left hand and spoon the foam into the lid, then pour it down the drain.  This needs to be done until the foam is about gone (5 minutes or so).  Simmer beans for about an hour or more until the beans are tender.  I drain the beans unless I plan to make bean soup.  You can season at this point or wait until serving.  Spoon some of the beans into containers to freeze.  Save some with the liquid for bean soup, and make hummus with the remaining beans for dipping carrots, celery or crackers into this high protein snack.

Complete protein:  By eating a grain with beans, you will have a complete protein (a meat substitute).  Whole grain bread or crackers, rice cakes or crackers, or a bean and rice dish will suffice.

Making Your Own Fresh Ginger Paste

Ginger helps aid digestion and adds great flavor to many soups and other dishes!  Pureed ginger is available to purchase in small jars, but here's how you can save money by making your own pureed ginger that will be even more fresh than jarred ginger.  Buy a large hunk of ginger root in the produce department of the grocery store.  Cut it apart into easy-to-peel sections, and peel with a vegetable peeler. Slice the ginger and put it into a Vita Mix or other blender with a little water and olive oil.  You want it to be the consistency of paste, so just add a tiny bit at first.  Blend until pureed, and spoon the ginger paste into Tupperware Midget cups or very small containers, and freeze.  I keep one small container handy in the refrigerator door to add to recipes.

For delicious lemon-ginger tea, drop a few slices of fresh ginger root into a large teacup with a lemon zinger teabag.  Fill with boiling water and steep (covered) for about 5 minutes.  Add stevia and enjoy!

Monday, February 27, 2012

Butternut Ginger Soup

Thanks to Rhoda Long in Virginia who made this wonderful soup for me for a birthday lunch several years ago, and served it with hummus and crackers!  A delicious lunch I will never forget!

          Butternut Ginger Soup with Sauteed Kale on the Side

                                Photo by Betty Mennuti

5 cloves garlic, pressed in garlic press
1 medium butternut squash, halved and seeded
1 carrot, peeled and thinly sliced (3/4 cup)
1 large onion, chopped (2 cups)
1 Tbsp. olive oil
4 cups low-sodium vegetable broth
1 sweet red apple, peeled and cut into chunks (1 1/2 cup)
1 bay leaf
1/2 tsp. curry powder
1/4 tsp. ground nutmeg
3/4 tsp. freshly grated ginger (or ginger paste)
salt to taste
pinch of white pepper
1/2 cup nonfat plain yogurt, whole milk or coconut milk
chopped fresh parsley or cilantro, shredded carrot, or finely grated Parmesan or Gruyere cheese for garnish

Bake or microwave squash (halves facing down) with a little water in a baking pan.  Scoop out pulp (3 1/4 cups).  In large pot saute' carrot and onion in olive oil until onions are translucent (3-5 min.).  Add squash, broth, apple, bay leaf, curry, nutmeg, ginger, salt and pepper.  Bring to boil, reduce heat, cover and simmer until apples are soft (15 min.).  Remove bay leaf.  Puree' in food processor or blender.  Return to pot and add yogurt.  Serve in soup bowls and add garnish.

Note from Lois:  The amounts may be altered, according to your preferences, such as less garlic and more ginger.  This soup freezes well.

For More Butternut Squash Recipes:
http://draxe.com/butternut-squash-recipes/?utm_campaign=Article-Oct-2015&utm_medium=Social&utm_source=Facebook&utm_term=Butternutsquash


Friday, January 27, 2012

Herb Substitution Chart


Herb Substitutions
BasilOregano or thyme
ChervilTarragon or parsley
ChiveGreen onion; onion; or leek
CilantroParsley
Italian SeasoningBlend of any of these: basil, oregano, rosemary, and ground red pepper
MarjoramBasil; thyme; or savory
MintBasil; marjoram; or rosemary
OreganoThyme or basil
ParsleyChervil or cilantro
Poultry SeasoningSage plus a blend of any of these: thyme, marjoram, savory, black pepper, and rosemary
Red PepperDash bottled hot pepper sauce or black pepper
RosemaryThyme; tarragon; or savory
SagePoultry seasoning; savory; marjoram; or rosemary
SavoryThyme; marjoram; or sage
TarragonChervil; dash fennel seed; or dash aniseed
ThymeBasil; marjoram; oregano; or savory

Healthy Turkey or Chicken Sausage

A flavorful, versatile, and healthy replacement for most sausage found in grocery stores. 

Notes:
Cooked, shredded chicken or turkey will also make delicious sausage, but it won't form onto patties or links.

An egg may be added but it is not necessary (for those with egg allergies).  If allergic to only egg whites, a yolk may be added, although the egg white is what holds foods together.

1 lb. ground turkey or chicken (white breast meat)
1 tsp. ground dried thyme (or crushed thyme leaves)                       
1 tsp. dried marjoram (rosemary or tarragon may be substituted)      
1/2 tsp. poultry seasoning (or sage)                                                    
1/8 tsp. ground allspice
3/4 tsp. sea salt
1/4 tsp. ground black pepper (optional)
1 1/2 tsp. liquid smoke (optional)
1/3 cup water

McCormick Roasting Rub French Herb, a blend of onion, salt, rosemary, marjoram, thyme, sage, tarragon, lavender, garlic and spices could replace the first three herbs (use 2 1/2 tsp.) and add the remaining five ingredients, if desired.  Lately I've been using this blend of herbs on almost everything.  I omit the ground pepper and liquid smoke.

Wet your hands with water, and mix "sausage" with hands, then shape into patties or lengthwise sausage links.  Cook in olive oil or coconut oil or freeze for later.  Add a few tablespoons at the end of cooking in order to release the flavor sticking to the pan.  It will also add a little more moisture to the sausage.