Saturday, April 27, 2013

Delicious Homemade Mayonnaise and Salad Dressing

Delicious Homemade Mayonnaise
(A fool-proof way I've found to make homemade mayonnaise is to use a stick blender!)

1 whole egg
1 egg yolk
1/2 tsp. dry mustard
1 Tbsp. apple cider vinegar
1 cup light olive oil

Put the first four ingredients into your stick blender container and mix well with the stick blender. 

Pour half of the mild olive oil into the blender container. 
I use "light" olive oil for mayonnaise because I think the flavor is much too strong when using regular cold pressed virgin olive oil.

Insert the stick blender into the bottom of the container. Press the "On" button and slowly pull upward as the mixture thickens.  Add the remaining oil and repeat. 


Add salt to taste.  Sometimes I like to add celery salt, garlic salt, onion powder, dill weed and a tiny bit of Nustevia.

The last couple times I made mayonnaise, I added a big handful of fresh basil, parsley, and oregano leaves growing on the sundeck to the blender mayo for a light green and flavorful spread.  This makes the most wonderful salad dressing, when thinned down a bit with water or coconut milk, and these green herbs add nutrients as well as flavor.


Salad Dressing
Make your own mayonnaise and transform a portion as a base in making salad dressing, thinning it down a bit with water.  After I make mayonnaise,  I make a dressing by adding the following ingredients: celery salt, garlic salt, onion powder, dill weed, Nu-Stevia, and salt.  Measurements are not given since I don't have specific amounts.  You can add almost any combination of spices for various dressings.  
Make honey mustard dressing simply by adding honey and mustard to the dressing above!

Homemade Cool-Aid

by Veronica Stanley-Hooper - http://www.handsonlearning4all.com/wp/?p=1003
Excerpts from Veronica's article - Please go to her website for ALL of her article and beautiful photos of the beverages! - Used by permission

Note from Lois:  Eliminate sugary drinks containing chemicals from your family's diet for much better health and wellness.  Veronica gives some wonderful alternatives.  Natural concentrated juices can be diluted a good bit and still have lots of nutritious flavor, thus making them stretch a long way.  So Refreshing!

Sweet Southern Cherry:
Tart Cherry and Apricot or Peach Juices

Sour Cherry Splash:
Tart Cherry and Lemon Slices with a splash of Apple Juice
 
Refreshing Lemon Mint:
Lemon Slices, Mint Leaves and a green tea bag (you can leave out the green tea if you like)

Blueberry Blast:
Blueberry Juice and Apple Juice

Tropical Sensation:
Coconut Milk, Pineapple Juice, and a splash of Apple Juice


Tuesday, March 26, 2013

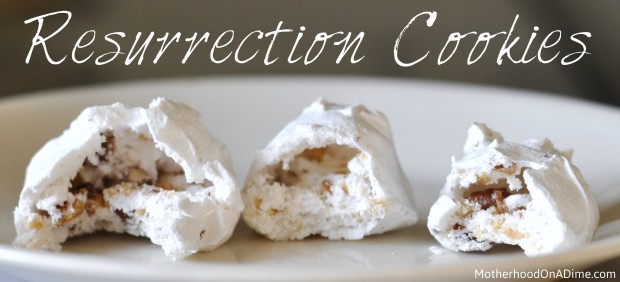
Resurrection Cookies: Directions & Printable Recipe


WP Greet Box icon
X
Welcome! I'm on a journey to spend wisely, save faithfully, and give freely. I'd love for you to join me! If you are new here, you might want to get FREE daily updates via email or RSS.
I’ve had this recipe for Resurrection Cookies in my Easter file for a while, but this is the first year I felt my girls were ready for them.  (The last few years we’ve made Resurrection Rolls — just because I felt the simpler approach to the death and resurrection of Jesus was more age-appropriate for younger preschoolers).
I would suggest reading the Bible story of Jesus’ death and resurrection aloud to your children before you begin making these cookies.  I particularly like the version in The Child’s Story Bible by Catherine Vos for older preschool and elementary-aged children.

resurrection cookies


Resurrection Cookie Recipe

Supplies:

  • 1 cup almonds (or pecans)
  • 1 tsp. vinegar
  • 3 egg whites
  • Pinch of salt
  • 1 cup sugar
  • Zipper baggy
  • Wooden spoon
  • Mixing bowl
  • Mixer
  • Cookie sheet
  • Spoons
  • Tape
  • Bible

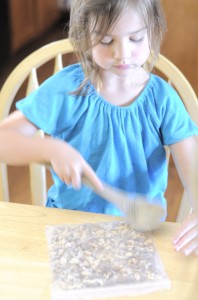
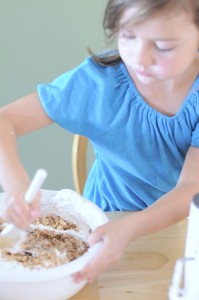
1)  PREHEAT OVEN TO 300 DEGREES.  Place one cup nuts into a baggy.  Beat the nuts with a wooden spoon until broken into tiny pieces.  Remind children Jesus was beaten by the Roman Soldiers.

Read John 19:1-3

1 Then Pilate took Jesus and had him flogged. 2 The soldiers twisted together a crown of thorns and put it on his head. They clothed him in a purple robe 3 and went up to him again and again, saying, “Hail, king of the Jews!” And they slapped him in the face.
I also included Isaiah 53:5:
But he was pierced for our transgressions, he was crushed for our iniquities; the punishment that brought us peace was on him, and by his wounds we are healed.

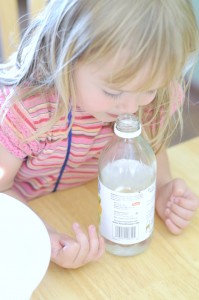
2)  Allow each child to smell the vinegar.  Pour a small amount into a bowl and allow them to taste it.  Explain that vinegar was given to Jesus to drink when he was on the cross.  Add 1 tsp. vinegar into a mixing bowl.

Read John 19:28-30

 28 Later, knowing that everything had now been finished, and so that Scripture would be fulfilled, Jesus said, “I am thirsty.” 29 A jar of wine vinegar was there, so they soaked a sponge in it, put the sponge on a stalk of the hyssop plant, and lifted it to Jesus’ lips. 30 When he had received the drink, Jesus said, “It is finished.” With that, he bowed his head and gave up his spirit.

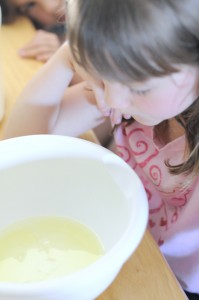
3)  Add egg whites to vinegar.  The eggs in this recipe represent life.  They remind us that Jesus gave his life to give us life abundantly.

Read John 10:10-11

10 The thief comes only to steal and kill and destroy; I have come that they may have life, and have it to the full.  11 “I am the good shepherd. The good shepherd lays down his life for the sheep.

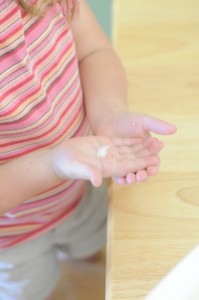
4)  Put a pinch of salt in your child’s hand.  Allow them to taste it.  Add a pinch of salt to to the eggs and vinegar.  The salt represents the salty tears cried by the women who followed Jesus.

Read Luke 23:27

27 A large number of people followed him, including women who mourned and wailed for him

5)  Place a pinch of sugar in your child’s hand.  Allow them to taste it.  Add one cup sugar to the mixture.  Up to this point, the ingredients have been very  bitter, but the sweetness in the recipe comes from the sugar.  The suffering and death of Jesus are bitter, but the sweetness is that Jesus died because He loves us.  Oh, how He loves us!

Read Psalm 34:8

8 Taste and see that the LORD is good; blessed is the one who takes refuge in him.

Read John 3:16

16 For God so loved the world that he gave his one and only Son, that whoever believes in him shall not perish but have eternal life.

6)  Beat the mixture for 12-15 minutes until stiff peaks are formed  (I recommend setting a timer — it’s important to beat the mixture well).   The whiteness of the mixture reminds us of purity and the cleansing of our sins because of Jesus’ death.

Read Isaiah 1:18:

18 “Come now, let us settle the matter,”
says the LORD.
“Though your sins are like scarlet,
they shall be as white as snow;
though they are red as crimson,
they shall be like wool.

7)  Stir in the nuts.

8)  Drop the dough by spoonfuls onto a cookie sheet.  The mounds represent the tomb where Jesus was buried.

Read Matthew 27:57-60

57 As evening approached, there came a rich man from Arimathea, named Joseph, who had himself become a disciple of Jesus. 58 Going to Pilate, he asked for Jesus’ body, and Pilate ordered that it be given to him. 59 Joseph took the body, wrapped it in a clean linen cloth, 60 and placed it in his own new tomb that he had cut out of the rock. He rolled a big stone in front of the entrance to the tomb and went away.
9)  After the oven is preheated, put the cookie sheets in the oven.  TURN OFF the oven.  Allow your child to place pieces of tape and “seal” the oven door.  Jesus’ tomb was sealed with a large rock.

Reread Matthew 27:59

59 Joseph took the body, wrapped it in a clean linen cloth, 60 and placed it in his own new tomb that he had cut out of the rock. He rolled a big stone in front of the entrance to the tomb and went away.
10)  Leave the cookies in the oven overnight.  Your child might feel sad to leave the cookies in the oven overnight (they were probably expecting to have a yummy treat soon – at least mine were).  Jesus’ followers were very sad when the tomb was sealed.

John 16:20-22

20 Very truly I tell you, you will weep and mourn while the world rejoices. You will grieve, but your grief will turn to joy.21 A woman giving birth to a child has pain because her time has come; but when her baby is born she forgets the anguish because of her joy that a child is born into the world.22 So with you: Now is your time of grief, but I will see you again and you will rejoice, and no one will take away your joy.
11)  In the morning, open the oven and have some cookies!  The cookies should be hollow inside.  Remind your child that the tomb was empty.  Jesus is risen!

Read Matthew 28:1-9

1After the Sabbath, at dawn on the first day of the week, Mary Magdalene and the other Mary went to look at the tomb.
2 There was a violent earthquake, for an angel of the Lord came down from heaven and, going to the tomb, rolled back the stone and sat on it. 3 His appearance was like lightning, and his clothes were white as snow. 4 The guards were so afraid of him that they shook and became like dead men.
5 The angel said to the women, “Do not be afraid, for I know that you are looking for Jesus, who was crucified. 6 He is not here; he has risen, just as he said. Come and see the place where he lay. 7 Then go quickly and tell his disciples: ‘He has risen from the dead and is going ahead of you into Galilee. There you will see him.’ Now I have told you.”
8 So the women hurried away from the tomb, afraid yet filled with joy, and ran to tell his disciples. 9 Suddenly Jesus met them. “Greetings,” he said. They came to him, clasped his feet and worshiped him.
Although these are personally not my favorite cookies (two of my girls loved them — one did not!), they are a great way to learn about the crucifixion and resurrection in a hands-on way for kids.  If you would like these directions in a printable form, please feel free to download the sheets I’ve put together with the Resurrection Cookies Recipe.

**I am unable to locate an original source for this recipe.  If you know the original creator of this Easter cookie recipe, please send me an email so I can give proper credit!  All Scripture references are taken from the NIV translation.


———————————————————————–

Looking for more simple ideas for kids? Consider signing up for my Motherhood on a Dime KIDS newsletter. You’ll receive 2-3 kid-friendly activities each week via email.

Wednesday, February 27, 2013

Grain Free Dessert: No Bake Apricot Almond Bars

by Cara Faus - http://www.healthhomehappy.com/

Free of eggs, sugar, gluten, grain, chemicals, and preservatives.
This is a part of Grain Free Baking Week at Health, Home, and Happiness! We are baking a few recipes from the Nourished Kitchen Guide to Grain Free Baking and Treats!
My children rave about fruit and nut bars like they have addictive qualities, and these are no exception. They love hand held sweet-nutty combinations of GAPS friendly ingredients!  Apricots and almonds pair together here with the addition of coconut and flax to make a substantial snack or breakfast in a pinch.
Ingredients:
  • 2 cups blanched almond meal or flour
  • 1/2 cup flax meal*
  • 1/2 cup roasted almond butter
  • 1/2 cup dried unsweetened coconut
  • 1/2 cup dried apricots
  • 1/2 cup coconut oil, melted, plus extra for greasing the pan
  • 1/2 teaspoon unrefined sea salt
Instructions:
  1. Toss all ingredients into a food processor and process until smooth.
  2. Grease a baking dish (9″x9″ works well) and spread the mixture evenly into the baking dish.
  3. Allow almond-apricot bars to harden overnight.
  4. Cut with a sharp knife and serve as a sweet dessert or snack.
 

Baked Kale Chips

1 bunch kale
1 tablespoon olive oil
1 teaspoon seasoned salt

Preheat an oven to 350 degrees.  Line a non insulated cookie sheet with parchment paper.  With a knife or kitchen shears carefully remove the leaves from the thick stems and tear into bite size pieces. Wash and thoroughly dry kale with a salad spinner. Drizzle kale with olive oil and sprinkle with seasoning salt.Bake until the edges brown but are not burnt, 10 to 15 minutes.

Wednesday, January 30, 2013

Homemade Beef Sausage - without Nitrates

Yes, we can make our own sausage without nitrates and unnecessary additives!  Here's how!

This recipe is from Best of Grain Free Meal Plans - Volume 1 - by Cara Faus
3 lbs of ground beef
1-2 onions, chopped finely
1/2 teaspoon of 3 different sweet spices (cinnamon, allspice, nutmeg, ginger etc)
1 teaspoon cayenne pepper
1 teaspoon each of at least 5 different savory spices (cumin, coriander, ground pepper, sage, oregano, etc)
2 teaspoons sea salt
1 tablespoon basil
2 eggs
 
Directions:
Mix all ingredients together with a fork or a stand mixer until spices are thoroughly mixed into the meat. Shape into patties and fry in coconut oil on med to med-high until no longer pink in the center. If you're pressed for time, only cook the amount you need today and form the rest into patties to stick in the freezer for later use. If you have more time today and would like to save time later, slightly under cook all the patties and freeze. The patties will finish cooking with reheating.

Sunday, December 30, 2012

How to Find Locally Grown Organic Foods


http://www.westonaprice.org/local-chapters/find-local-chapter

Local chapters help you find locally-grown organic and biodynamic vegetables, fruits and grains; milk products, butter, eggs, chicken and meat from pasture-fed animals.  They also represent the Weston A Price Foundation at local fairs and conference and may host cooking classes, potluck dinners and other activities to help you learn to integrate properly prepared whole foods into your lifestyle.  Local chapters may be able to put you in touch with health practitioners who share the same philosophy and goals.


Sugar Free Oat Drops

http://blueberrygirlinoz.blogspot.com/2010/05/no-sugar-oat-drops.html

These are actually drop cookies, but as explained at the end, they can also be made using cookie cutters!

When I first saw this recipe I was intrigued by the fact that these have NO sugar, butter, eggs or anything that can be considered unhealthy. Always on the hunt for things to throw at me kids at feeding time, I gave them a whirl. They are amazing, surprisingly light, incredibly filling and tasty. You can freeze them individually and you have a easy breakfast on the go, that contains your protein and carbs to set you up for the day.

1 1/2 cups regular rolled oats (Use gluten free oats if on a gluten free diet)
1 cup coconut flakes (Unsweetened)
1/2 teaspoon salt
1 teaspoon cinnamon
1/2 teaspoon allspice
1/4 cup of almond meal
1/2 cup mixed nuts, finely chopped
1 cup dried fruit (I used 1/2 chopped dried dates, and 1/2 raisins)

3 ripe bananas, mashed
1/4 cup canola oil
1 teaspoon vanilla extract

Preheat oven to 350 degrees. Line baking sheet with parchment paper.

In a large bowl, combine rolled oats, almond meal, mixed nuts and coconut flakes. Stir in allspice and cinnamon. Add dried fruit and stir until well and evenly mixed. Make sure the dried fruit do not stick together in big batches.

In another bowl, combine canola oil, mashed banana and vanilla extract. Pour wet ingredients over dry ingredients and stir until well combined.

Take a large cookie cutter and press spoonfuls of the batter into it. Remove cookie cutter. Bake for about 20 minutes or until edges are golden brown.

Peeling Potatoes the Easy Way

This is especially a time and energy saver when making a large amount of mashed potatoes or potato salad!  It really works! http://lajollamom.com/2010/10/food-on-fridays-peeling-potatoes-without-a-peeler/
Boil a large pot of water.
Score Idaho potatoes around the "waist" with a sharp knife.
Put scored potatoes into boiling water and cook until tender.
Plunge hot potato into ice water.
Hold potato with a hand on each end, and pull off the skin.
It's like magic!


Wednesday, December 12, 2012

Pumpkin Poppers Gluten Free Grain Free


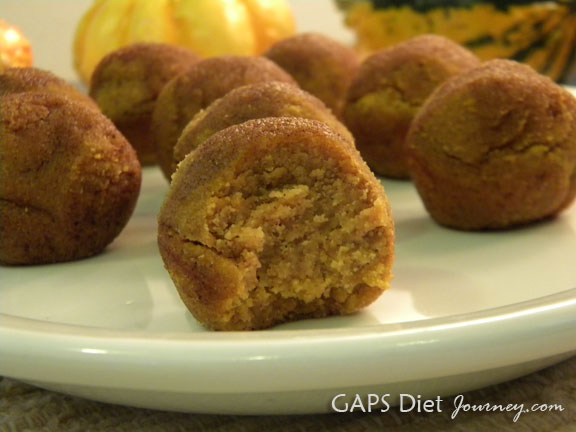
Pumpkin Poppers with Cinnamon Topping
Something about the weather cooling down brings out the pumpkin lover in me.  In my twenties when my children were very little, we always roasted a big Jack-o-Lantern pumpkin, usually after we’d carved it earlier in the day. However, when I started gardening seriously in my 30s I learned that the big pumpkins are apparently not actually meant for human consumption, and to make the best pumpkin pie you should use the special (expensive) little pie pumpkins.  Purportedly the big pumpkins are less sweet and can have a grainy texture, and are mostly fed to livestock.
I was shopping at one of the local discount food stores and they had a large supply of Jack-o-Lantern pumpkins for $1.99, and they were all larger than a basketball.  We had been invited to a potluck and I called to ask the hostess if she would like me to buy a couple for her to use as decorations.  And then I bought two for myself.
We never did carve the pumpkins, and I got to thinking that less sweetness is probably a good thing for those of us on GAPS.  And winter squash has been so expensive so far this year.  I decided that I was going to try roasting one of the big pumpkins and I was happy with the result.  I did find that the pumpkin texture had a slight bit of crunch, but that was not enough of a deterrent to finding ways to use them.
I was browsing around the Internet and I found these cute little pumpkin bites* which were of course made with regular white flour, sugar and other non-GAPS allowed ingredients, so I decided to test my conversion skills.
I brought these to work with me on Halloween to share with my coworkers and my boss liked them so much that she requested that I bring them to our Christmas potluck.
These remind me of cake doughnut holes… they are moist and delicious with a hot cup of tea or GAPS Friendly Hot Chocolate.  They also freeze perfectly well so you can make ahead of time – just remember to thaw to room temperature which will take about two hours.  You will find a printable version of this recipe at the bottom of the post.
Oh, and one more thing: These are dairy-free, but of course butter is legal on GAPS.  If you do not have to avoid butter, you may want to substitute the cinnamon topping mixture with butter instead of coconut oil.  It is quite delicious.
Yields: 18
Pumpkin Poppers

Be sure to get an exact 1/2 cup of coconut flour by using the back of a straight edged knife to level off the flour even with the top edge of the measuring cup. Measure all dry ingredients (coconut flour down to ginger) in a large mixing bowl.  If you freeze your coconut flour (like I do with mine to keep it moist and fresh), you may sift after measuring to make sure there are no little hard clumps.
Mix together.
Pumpkin Poppers Dry Ingredients
Place 3 eggs into your Magic Bullet, blender or food processor with 1/2 cup of cooked carrots and 1/2 cup pumpkin. Feel free to use any kind of winter squash or any combination of pumpkin, winter squash or carrots.

Blend until completely smooth.
Place melted coconut oil, honey and vanilla into a small bowl. Add the winter squash and eggs mixture into the bowl and whisk.Pumpkin Poppers Wet Ingredients
Add wet ingredients to dry ingredients.  Using a hand mixer, blend for 1-2 minutes until completely mixed. As the coconut flour absorbs the liquids the mixture will go from a very runny consistency to a thicker consistency.
Pumpkin Poppers Batter
Allow the batter to sit for 5 minutes so that the coconut flour can absorb the liquids.

Preheat oven to 325°F.
Pumpkin Poppers Batter
Use coconut oil to grease a mini muffin tin.
Lightly sprinkle coconut flour into the bottom of each muffin cup.
Measure out two tablespoons of batter for each popper.  It would be awesome to have one of these: [easyazon-link asin="B000SSVRYM" locale="us"]Norpro 703 Grip-EZ 2-Tablespoon Stainless Scoop[/easyazon-link].
The batter should be of the consistency where you can pick it up in your hands and form into a little ball. If you have to use a tablespoon measurement like me, be sure that you completely meld the two parts together, otherwise when they bake you will end up with little splits and fissures where you placed them together. If by chance your batter is not thick enough, add in coconut flour by the teaspoon waiting a minute or two in between adding more. If your batter is too thick, you could try adding more pumpkin.
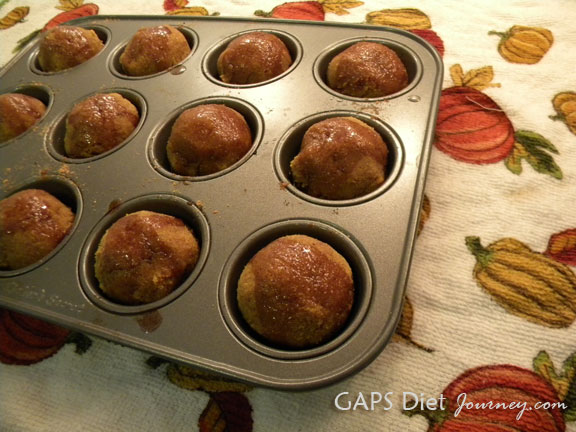
Drop into the muffin tins. I don’t advise using cupcake papers for this recipe – in the last step you will drizzle a liquid cinnamon topping which will make a sticky mess of the papers so it is best to just put them bare naked into the muffin tin.
Pumpkin Poppers in the Mini Muffin Tin
Bake for 20 minutes.

For the topping mix 1 tablespoon melted coconut oil with 1 tablespoon honey and 1/2 teaspoon ground cinnamon.
When the poppers are done, as soon as you remove them from the oven using a 1/4 teaspoon measuring spoon drizzle 1/4 teaspoon of the topping mixture on each popper.
The topping will melt into the popper and will also spill down and soak into the bottom.
Carefully remove each popper, they should not stick because of the coconut flour placed under each one but I had a couple that were still a little stubborn and didn’t want to come loose.
Pumpkin Poppers with Cinnamon Topping
Please let me know if you have any questions, comments or suggestions!
This post has been shared at Fat Tuesdays and at GAPS Friendly Fridays #18. This post was featured at Real Food Forager Sunday Snippets.

If you’re looking for more pumpkin recipes, here are some others from my blog:


Pumpkin Bread Gluten-Free, Grain-Free, Sugar-Free and Dairy-Free


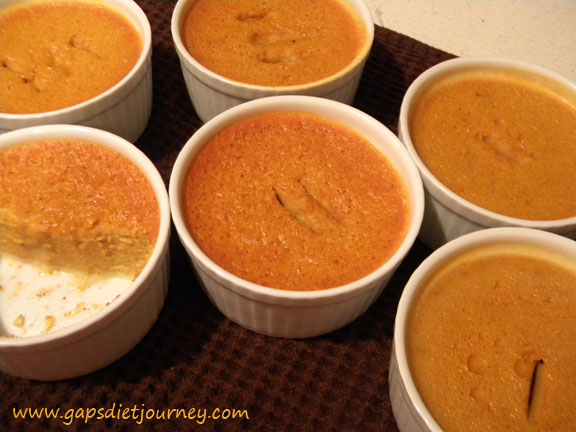
Pumpkin Coconut Milk Custard

Coconut Milk Honey Pumpkin Custard

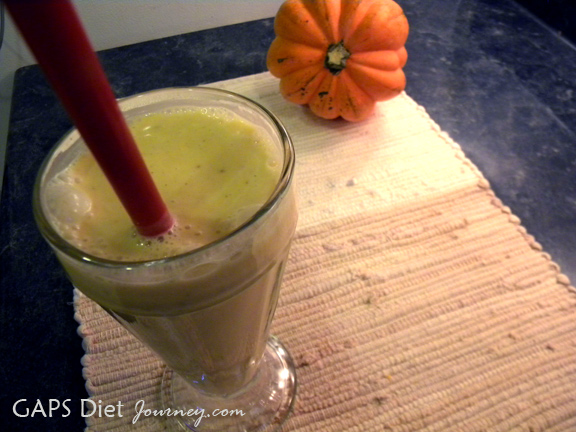
Pumpkin Coconut Smoothie

Coconut Milk Pumpkin Smoothie
Happy eating!

**If you order from Tropical Traditions by clicking on any of my Tropical Traditions links and are a brand new customer, you will receive this free book: Virgin Coconut Oil : How it Has Changed People’s Lives, and How it Can Change Yours, and I will receive a discount coupon for referring you. Thank you!

Pumpkin Poppers made with Coconut Flour
Recipe Type: Dessert
Cuisine: Gluten-free, Grain-free, Dairy-free
Author: Starlene Stewart from GAPS Diet Journey
Prep time:
Cook time:
Total time:
Serves: 18
These little pumpkin bites are moist and delicious with a hint of cinnamon.
Ingredients
  • 1/2 cup coconut flour, firmly packed (I used Tropical Traditions)
  • 1/2 teaspoon sea salt
  • 1 teaspoon ground cinnamon + 1/2 teaspoon cinnamon, divided use
  • 1/4 teaspoon nutmeg
  • 1/2 teaspoon allspice
  • 1/4 teaspoon ground cloves
  • 1/4 teaspoon ground ginger (optional)
  • 3 large eggs
  • 1/2 cup cooked pumpkin and 1/2 cup carrots
  • 1/3 cup virgin coconut oil, melted + 1 Tablespoon coconut oil, divided use
  • 1/4 cup raw honey + 1 Tablespoon honey, divided use
  • 1 teaspoon vanilla
Instructions
  1. Be sure to get an exact 1/2 cup of coconut flour by using the back of a straight edged knife to level off the flour even with the top edge of the measuring cup. Measure all dry ingredients (coconut flour down to ginger) in a large mixing bowl. If you freeze your coconut flour (like I do with mine to keep it moist and fresh), you may sift after measuring to make sure there are no little hard clumps.
  2. Mix together.
  3. Place 3 eggs into your Magic Bullet, blender or food processor with the 1 cup of winter squash.
  4. Blend until completely smooth.
  5. Place melted coconut oil, honey and vanilla into a small bowl. Add the winter squash and eggs mixture into the bowl and whisk.
  6. Add wet ingredients to dry ingredients.
  7. Using a hand mixer, blend for 1-2 minutes until completely mixed. As the coconut flour absorbs the liquids the mixture will go from a very runny consistency to a thicker consistency.
  8. Allow the batter to sit for 5 minutes so that the coconut flour can absorb the liquids.
  9. Preheat oven to 325°F.
  10. Use coconut oil to grease a mini muffin tin.
  11. Lightly sprinkle coconut flour into the bottom of each muffin cup.
  12. Measure out two tablespoons of batter for each popper.
  13. The batter should be of the consistency where you can pick it up in your hands and form into a little ball.
  14. Drop into the muffin tins. I don’t advise using cupcake papers for this recipe.
  15. Bake for 20 minutes.
  16. For the topping mix 1 tablespoon melted coconut oil with 1 tablespoon honey and 1/2 teaspoon ground cinnamon.
  17. When the poppers are done, as soon as you remove them from the oven using a 1/4 teaspoon measuring spoon drizzle 1/4 teaspoon of the topping mixture on each popper. The topping will melt into the popper and will also spill down and soak into the bottom.
Notes
You may use all pumpkin or winter squash – I used 1/2 carrots for more orange color since my pumpkin was not orange enough for my liking. These freeze well and are just as delicious once brought to room temperature (about 2 hours).